About a month ago, Adam was invited to an end-of-summer party by a co-worker. First thing out of my mouth, of course, was "What do we need to bring?", fully expecting it to be a dessert. Nope, a side item/appetizer. A side item? Appetizers? Ugh. Not my forte. I let Adam pick this one.
"Tzatziki. We haven't had that in a while." Sure, sounded good to me. My favorite way to eat tzatziki (other than on a gyro), is simply with fresh veggies and pita bread. I didn't want just to provide any ol' pita bread though. I wanted homemade. I knew I had a recipe for it in my reader (yay! cross of another one!) and it seemed simple enough.
The day of the party arrived and I started prepping the tzatziki and working on the pita dough early in the day. Yet it never fails. Every time I have a party or some other engagement to bring goodies for, I am super rushed and mostly forget to take pictures. As was the case here. Those light, fluffy, fresh little round pitas snuck out of the house with nary a photo.
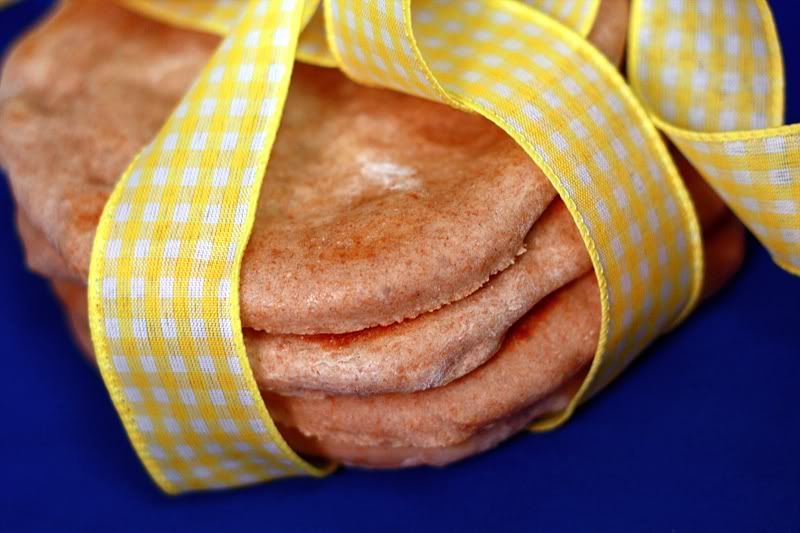
Thus I decided to make these again a couple weeks later. Which meant I got to eat them all. So much better for me. I really hate sharing.
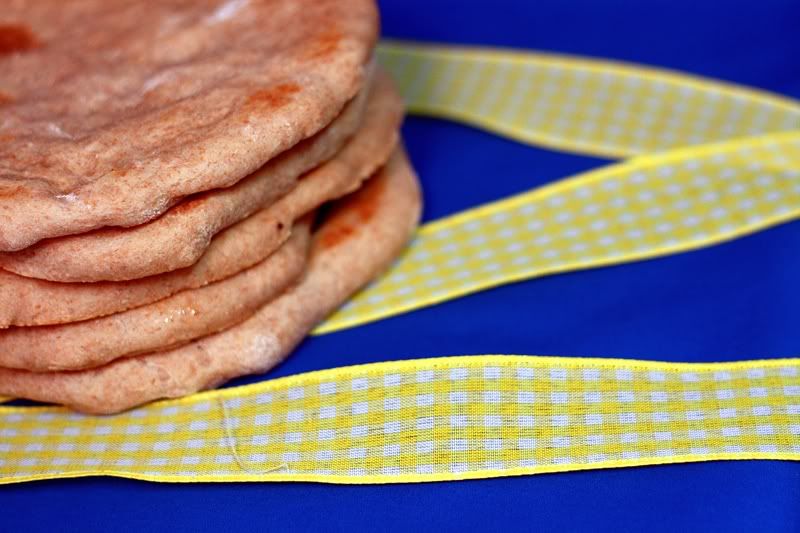


Whole-Wheat Pita Bread
Adapted From: Annie's Eats
Adapted From: Annie's Eats
2 1/4 teaspoons instant yeast
1 tablespoon honey
1 1/4 cups warm water (105˚-115˚ F), divided
1 1/2 cups bread flour, divided
1 1/2 cups whole wheat flour, divided
1/4 cup extra-virgin olive oil
1 teaspoon salt
Cornmeal, for sprinkling
In the work bowl of a stand mixer, combine yeast, honey and 1/2 cup of water. Stir gently to blend. Whisk 1/4 cup of the bread flour and 1/4 cup of the whole wheat flour into the yeast mixture until smooth. Cover the bowl with plastic wrap and set aside until doubled in bulk and bubbly, about 45 minutes.
Remove the plastic wrap and return the bowl to the mixer stand, fitted with the dough hook. Add in the remaining 3/4 cup of warm water, 1 1/4 cups bread flour, 1 1/4 cups whole wheat flour, olive oil and salt. Knead on low speed until the dough is smooth and elastic, about 8 minutes. Transfer the ball of dough to a lightly oiled bowl, turning once to coat, and let rise in a warm draft-free place, about 1 hour, until doubled in bulk.
Place an oven rack in the middle position. Place a baking stone in the oven (if using) and preheat to 500˚ F.
Once the dough has risen, transfer to a lightly floured work surface, punch down the dough and divide into 8 equal pieces. Form each piece into a ball. Flatten one ball at a time into a disk, then pat out into a 6 1/2 - 7 inch circle. Transfer the rounds to a baking sheet or other work surface lightly sprinkled with cornmeal. Once all the rounds have been shaped, loosely cover with clean kitchen towels. Let stand at room temperature for 30 minutes, until slightly puffy.
Transfer 4 pitas, 1 at a time, onto the baking surface (i.e. baking stone, pizza pan, or straight onto the oven rack). Bake 2 minutes, until puffed and pale golden. Gently flip the pitas over using tongs and bake 1 minute more. Transfer to a cooling rack and let cool completely. Repeat with the remaining pitas. Store in an airtight container for up to 3 days.
Makes: 8 pitas

During my first go-round with these pitas, I decided to cook them straight on the oven racks as I don't have a baking stone. While they turned out absolutely delicious, they were very wavy and a little hard to flip as I had to reach the tongs down in between the bars to grab the side.
The second time, I dug out a pizza pan that had been buried in the drawer under the oven for years. Guess it was time for it finally to get some use. This made the pitas much easier to flip and prevented the crazy waviness caused by the oven racks. The only downside was I'm not sure they were quite as fluffy as the first ones. Eh, can't win them all.
The thing I love most about these pitas is that they incorporate whole-wheat flour, but they don't end up dense, tough, and dry. Exactly the problem I have with most store-bought pitas. It is so true what everyone says -- once you make these, you'll find out just how easy they are and how much better they are than store-bought, that you will never go back.

| Nutrition Facts | |
| Amount per serving | |
| Calories 242 | Calories from fat 65 |
| % Daily Value | |
| Total Fat 7.3g | 11% |
| Saturated Fat 1.0g | 5% |
| Cholesterol 0mg | 0% |
| Sodium 294mg | 12% |
| Total Carbs 38.4g | 13% |
| Dietary Fiber 1.5g | 6% |
| Sugars 2.3g | |
| Protein 5.3g | |
| Vitamin A 0% | Vitamin C 0% |
| Calcium 1% | Iron 13% |


Looks great. We love pitas at our house and I will be sure to try these the next time we make a batch.
ReplyDeleteI love to make these! I make a similar recipe in my toaster oven, and I love to watch the pockets puff up! Yours look great. Now I'm curious whether putting them directly on the rack actually makes them fluffier. I'll have to check that out.
ReplyDeleteI'd love to try making my own pita...I'd have to find a way to make mine low carb but this might just inspire me!
ReplyDeleteI've yet to make my own pita bread but it is high on my to-do list. Yours look fantastic and they sound pretty easy to make! Thanks for sharing :o)
ReplyDelete